
Manage your Node-RED configuration in Git
Node-RED is an open-source project for low-code event-driven programming. It’s built on NodeJS and allows you to define automation flows with pre-made or custom-made nodes as well as inline JavaScript functions. It’s design was originally guided by the IoT use-case, so the workflow configurations are stored as un-versioned flat files. This can make it difficult to store and collaborate on workflow development.
In this project we’re going to setup Node-RED in a npm project so all the files can be tracked in a Git repository. This makes it easy to backup your configuration and work with collaborators.
Setting-up your environment
The only dependencies you’ll need to have before playing with Node-RED are Node.js and npm. As of writing time, the current LTS release of Node.js is v16 so that’s what we’ll be using. Installing Node-RED can be done either as their documentation suggests, with a global npm install, or as we’re going to be doing in this project, within a specific Node.js project.
First let’s create a new package.json file with npm.
npm init
Now we’ll install the node-red dependency to our project.
npm install node-red
Normally Node-RED stores all your settings and configuration in a .node-red directory in your user home, but we want all those files within our local project. To do that we’re going to first launch Node-RED with a commandline argument pointing to the current directory.
npm exec -- node-red --userDir=./
Feel free to poke around the editor before killing the process, it should be running on your local machine on port 1880. You’ll notice some new files in your project directory, some of these are cache files we don’t care about and one will be the settings.js file which we’re going to edit.
Before moving on though let’s create a .gitignore file to exclude all the files we don’t want in Git.
# Dependencies
node_modules/

# Editor temp files
.config.*.json
*.json.backup

# Credential key
.env
Editing the settings file
When you launched Node-RED it created a file called settings.js in your project directory. This file is prepopulated with default values for the configurable options. We’re going to edit the userDir setting first to point to our current directory.
// ...
module.exports = {
    // ...
    /** By default, all user data is stored in a directory called `.node-red` under
     * the user's home directory. To use a different location, the following
     * property can be used
     */
    userDir: './',
    // ...
}
We’ll continue to tweak this file in order to lock-down our Node-RED deployment. First let’s test out the change to the userDir setting by adding an editor npm script to our package.json for executing Node-RED with the settings file.
{
  // ...
  "scripts": {
    "editor": "node-red --settings=./settings.js",
  },
  // ...
}
Using dotenv to store the credential key
Some Node-RED nodes use passwords or other forms of credentials while executing. For example, the node-red-node-email node uses a username and password to retreive emails. These credentials get encrypted using a secret key and stored in the flows_cred.json file. This secret key should never be posted publicly so using an environment variable is a good option for passing it into Node-RED.
The dotenv npm package lets us create a local file named .env with any environment variables we want to configure. Since we added it to our .gitignore file already, the .env file won’t get checked into Git and will stay on your local machine. First let’s add the dependency to our project.
npm install dotenv
We’re going to set an environment variable named CREDENTIAL_FILE_KEY to be a randomly generated secret. This secret should be extremely difficult to guess so I recommend using a totally random string. The password generator from RANDOM.org is a good option for generating a secret key. For a little extra security you can generate two and concatenate them together.
CREDENTIAL_FILE_KEY=hefTcRcG3rLbCXCKwaE9GjZR
Now we need edit the settings.js file to use our key. You’ll need to import the dotenv library at the top of the file and then reference the environment variable. I added an immediatly-invoked-function that throws an error if for some reason it can’t load the variable. This helps avoid a situation where Node-RED starts running with undefined as the secret.
require('dotenv').config()
// ...
module.exports = {
    // ...
    credentialSecret: process.env.CREDENTIAL_FILE_KEY ?? (() => { throw new Error() })(),
    // ...
}
Creating a flow
Launch your Node-RED editor with the npm command we added to the package.json file earlier.
npm run editor
Use the editor to build a simple flow, or if you just want a copy my example you can copy contents of the the flows.json file from the CodeREVUE.net repository then use the “Import” tool in the editor. Once you have a flow you like you can deploy and save it using the “Deploy” button in the upper right.
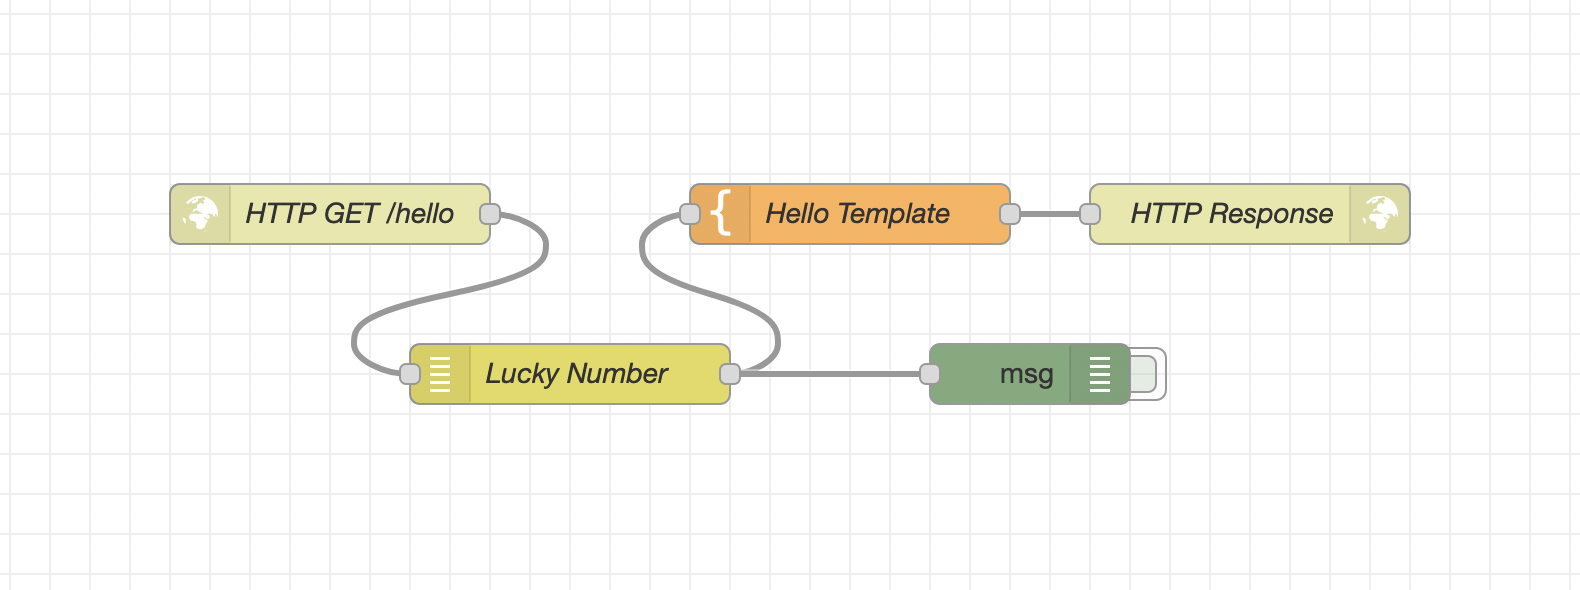
This flow takes input from a /hello HTTP request, adds a random number, and responds with a templated HTML page. If there’s a name param in the request then it’s included in the response. Once you have the flow deployed you can test it out at http://localhost:1880/hello?name=automator.
Commit your configuration
Clicking “Deploy” in the editor saves your flows to the flows.json file in your project directory. Commit the updated file to Git and it’ll be safely backed-up for others to use. Be sure you don’t ever commit your .env file with the credential key in it because that will expose any credentials you have saved!
With all your configuration in version control, you and your collaborators should be able to keep editing flows. Clone the repository, create the .env file, and launch the editor to keep the party going.